When dealing with large amounts of data, single-machine computation often fails or has very low reconstruction efficiency. In such cases, a cluster can be established to distribute the computation tasks to multiple computing devices for parallel processing, thereby improving the reconstruction efficiency for large datasets.
Setting up the Cluster Environment
Hardware requirements:
- N (N > 1) computing nodes, located on the same local area network, accessible to each other. Each computing node must meet the same requirements as the software.
- Network bandwidth greater than 1000Mbps; 10Gbps or higher is recommended.
- Unified storage space, accessible by all N computing nodes. It is recommended to use an SSD storage array. The storage space size can be determined based on task requirements. Software requirements:
- MipMap Desktop software, installed on the cluster's master node, responsible for task creation, management, distribution, progress monitoring, and result viewing.
- MipMap Cluster software, installed on the cluster's master node (usually on the same node as MipMap Desktop), responsible for cluster task scheduling and node management.
- MipMap Node software, installed on the cluster's child nodes, responsible for processing tasks distributed by the cluster.
Cluster License Binding
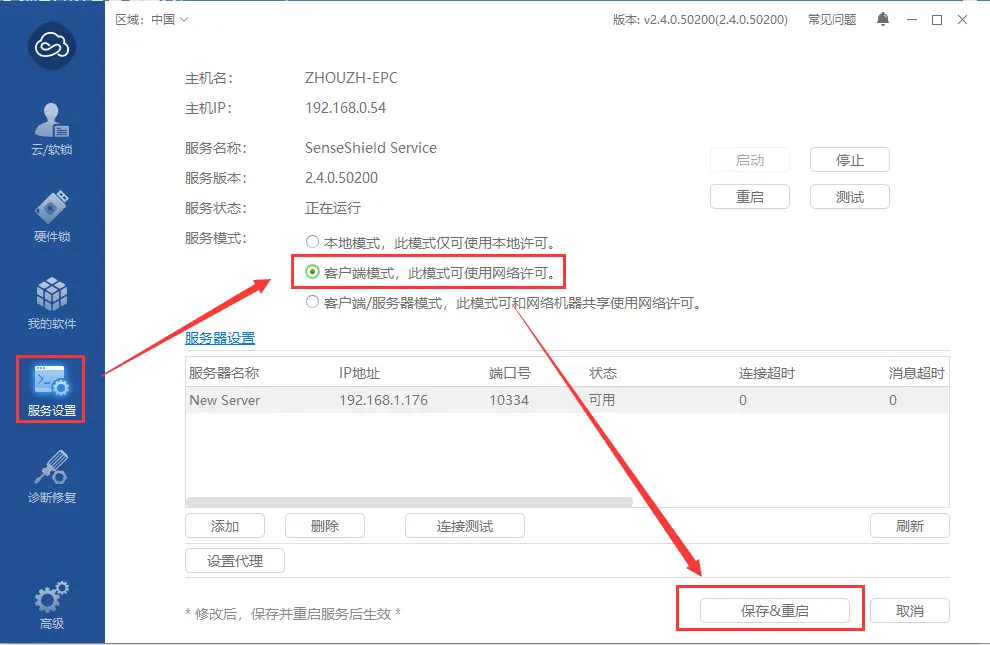
The cluster functionality uses a cluster version License. Enter the cluster License on the MipMap Desktop software on the master node. After successful binding, follow these steps: (1) On the master node, open the Virbox user tool, click [Service Settings], and select [Client/Server Mode] in the service mode.
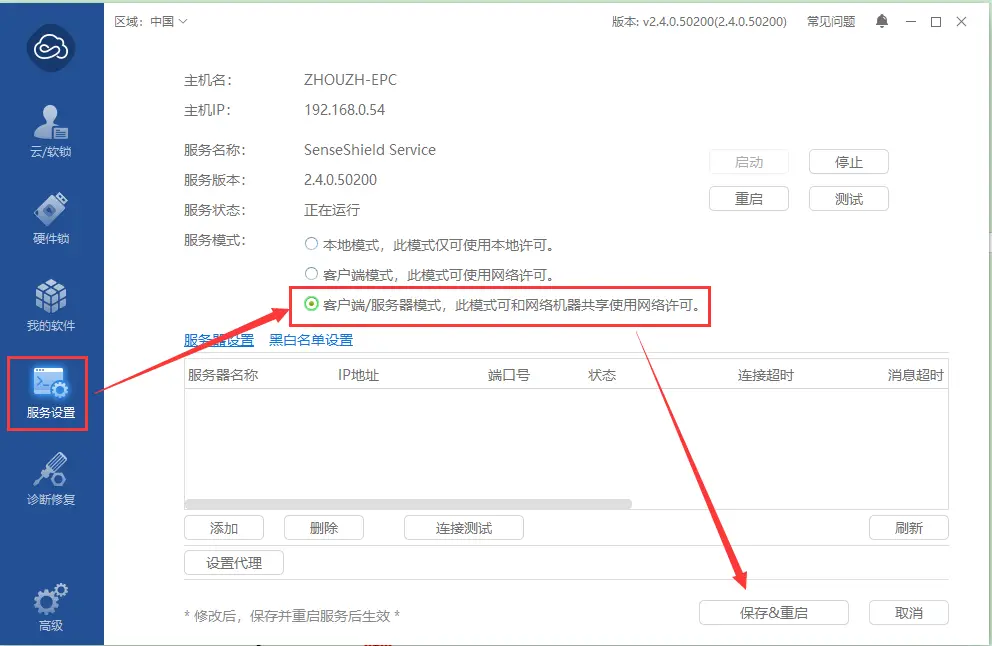
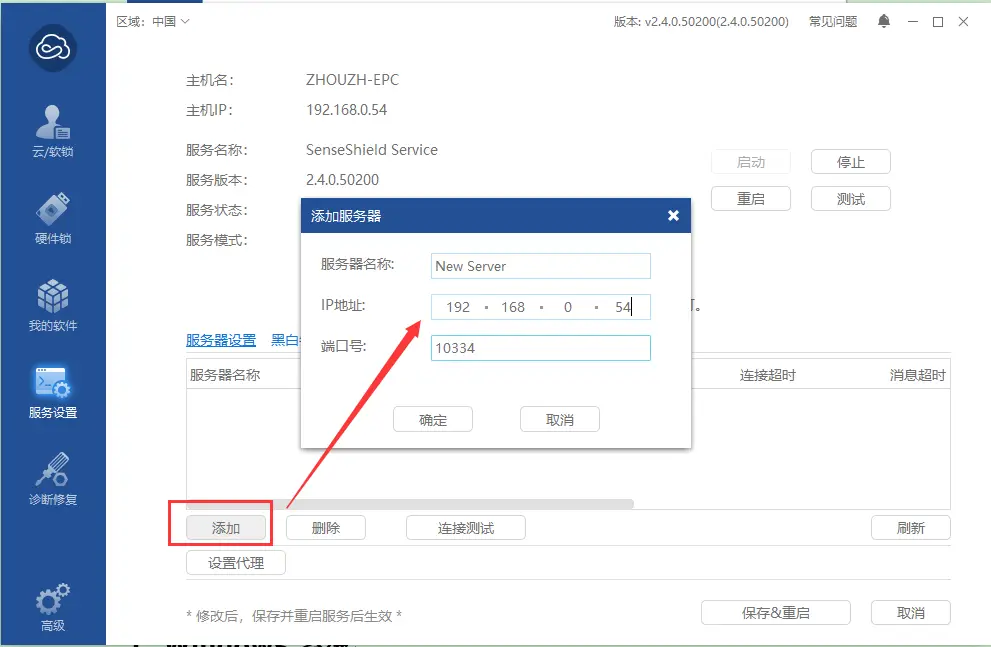
(2) In the server settings list, add server information. Enter the local IP address for the IP address and 10334 for the port. Then click [Save & Restart].】
(3) After successful addition, the local computer name will appear under [Cloud/Soft Lock] - [Local Soft Lock]. 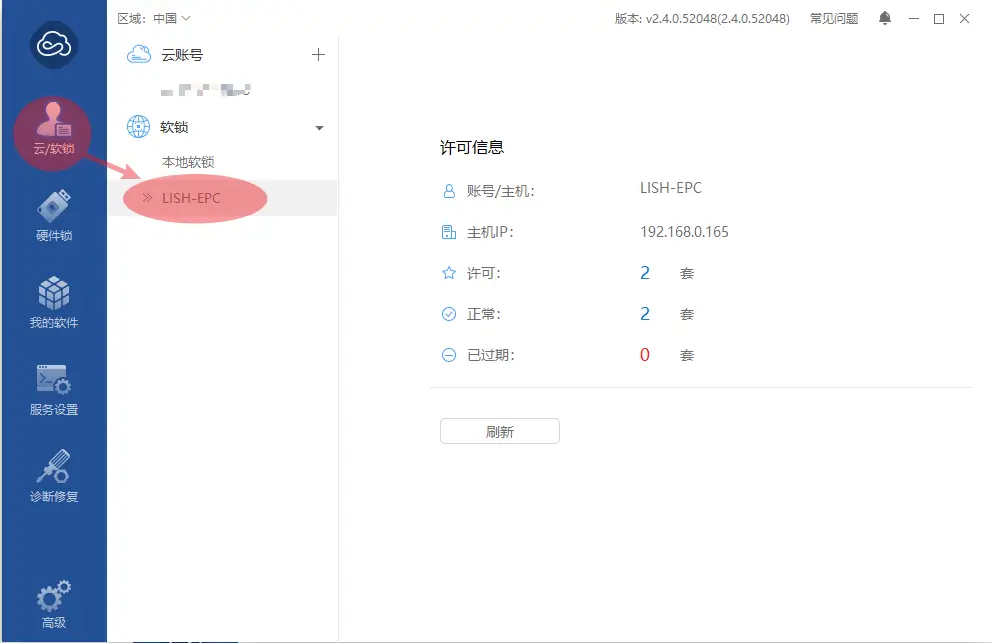
(4) On the child node, open the Virbox user tool, click [Service Settings], set [Client Mode] in the service mode, refresh the server to see the master node's server information, and click Save & Restart. [Generally, client mode is the default, so this step may not be necessary.]
Starting the Cluster Service
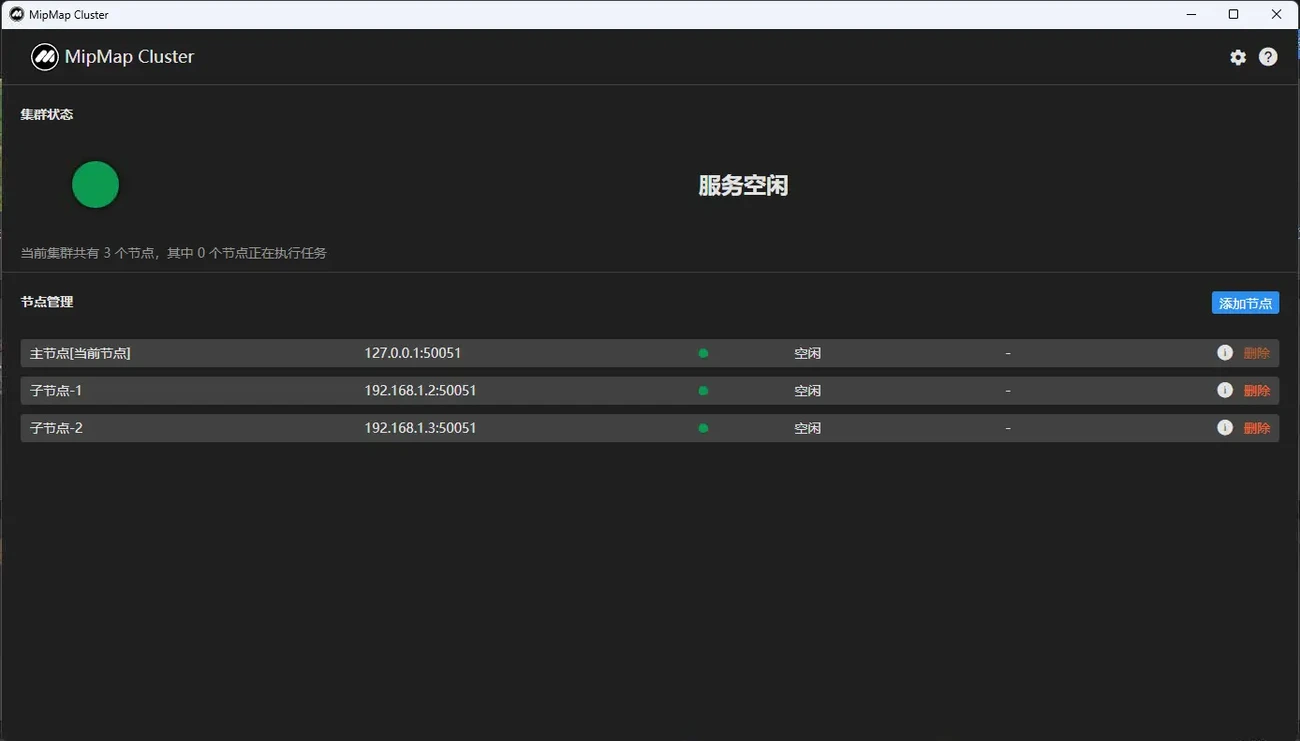
Open MipMap Cluster (on the master node) and MipMap Node (on child nodes) software. The services will start automatically. After startup, they will appear as shown below. If the service does not start normally, please close the software and reopen it. Child Node:
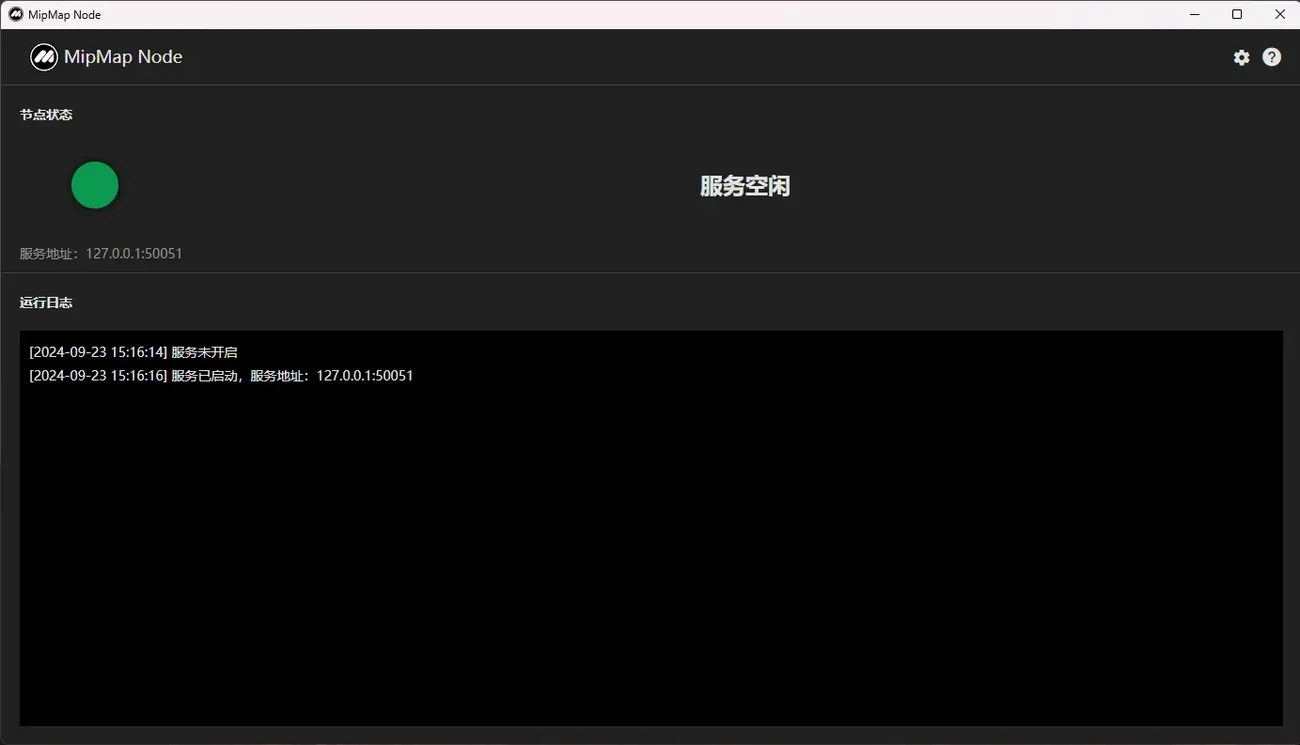
Master Node:
Working Directory Setup
- Set the task's working directory The software's working directory is where project results are stored. Ensure that the disk space for this directory is sufficient and that the directory path is accessible by all nodes. The task's working directory can be a mapped network drive or a network path. Using a Network Attached Storage (NAS) server is recommended. The directory containing the photos, like the working directory, needs to use a network drive or network path. When using a network drive, ensure that the drive letter on all nodes is consistent with the master node. For Windows PC configuration methods, refer to 10.2 Cluster Work Directory Configuration
- Set the node's working directory Click the settings button in the upper right corner to open the parameter settings panel. In this panel, you can set the cluster's working directory. The cluster's working directory mainly stores the intermediate result files and log information for that node's tasks.
Creating a Cluster Task
- Add child nodes in MipMap Cluster software Click the "Add Node" button on the panel. In the pop-up dialog box, enter the name and IP address of the child node service, and click OK.

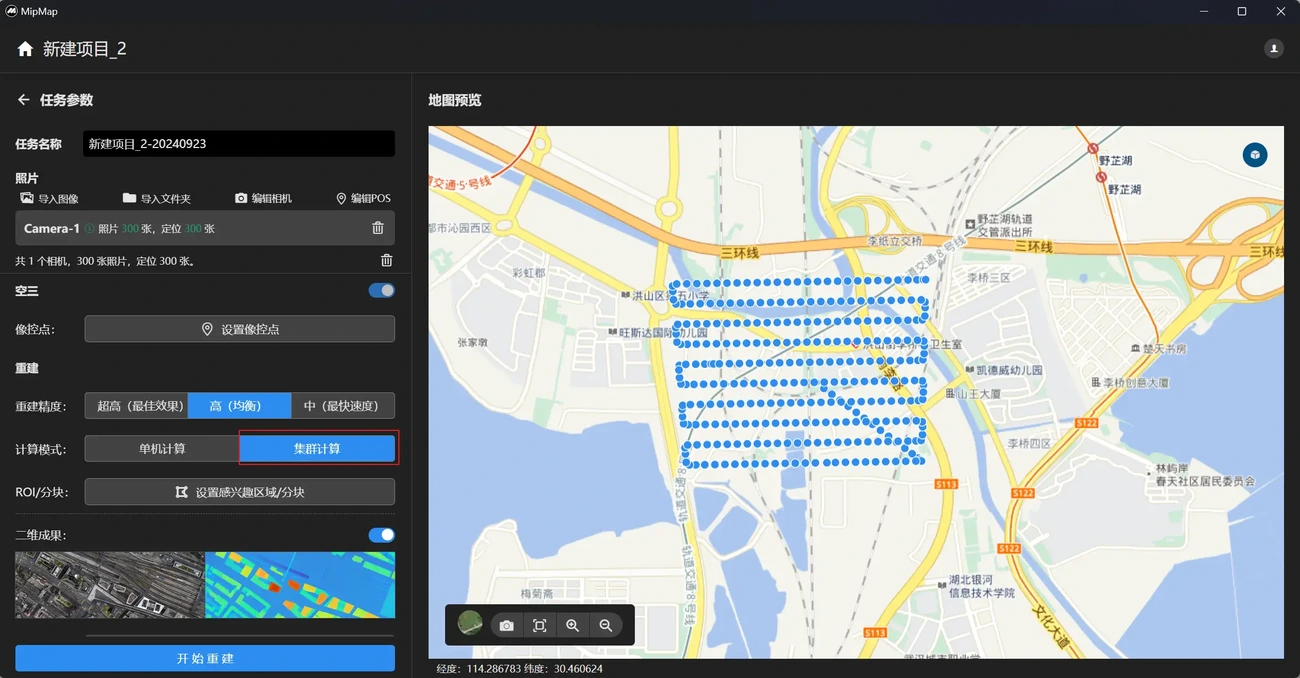
- Create a cluster task Create a task through MipMap software, set the reconstruction parameters, select "Cluster Computing" in the "Computation Mode" settings panel, and click Start Reconstruction.
Note: When selecting task photos, the photo path, like the working directory, needs to be accessible by all nodes. You can choose photos from a mounted network drive or a network path.