When performing cluster computing, the task's results directory and photo directory are shared by all nodes. Therefore, it's necessary to ensure that this directory can be accessed and written to by all nodes. In Windows systems, file sharing can be used to share with child nodes. There are two options for using a shared directory:
- Map the shared disk to a network drive, so all nodes can access it via a drive letter, just like accessing a local disk.
- Directly access the shared disk via a network path.
Check Node Cache Directory Space
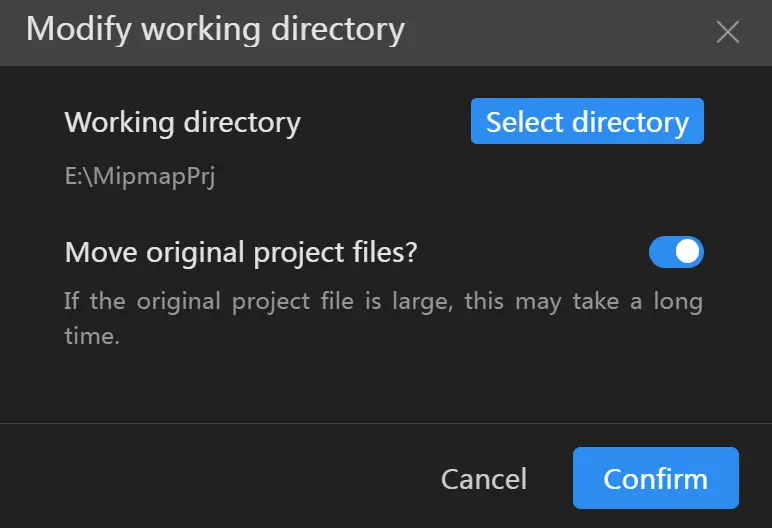
After installing MipMap Disptok (cluster operation platform), MipMap Cluster (main node cluster management platform), and MipMap Node (child node management platform), the working directory in Settings - General Settings will generally default to C:\Users\Administrator\Documents. Note: The working directory of MipMap Disptok is the working directory accessed by all nodes and is also the final results storage directory. When configuring with disk mapping, ensure that its disk drive letter is consistent with the mapped disk drive letter on each child node. The working directories of MipMap Cluster and MipMap Node are temporary working directories for that node. It is recommended to set them on the child node; temporary files for the project will be deleted after the project is built. After installing the software, users should first check if there is sufficient space in each software's working directory. It is recommended to adjust and configure based on the storage of their cluster computers.
Set Up System Sharing
Open the "Advanced sharing settings" in the Windows system. In the settings, enable "Network discovery" and "File and printer sharing".
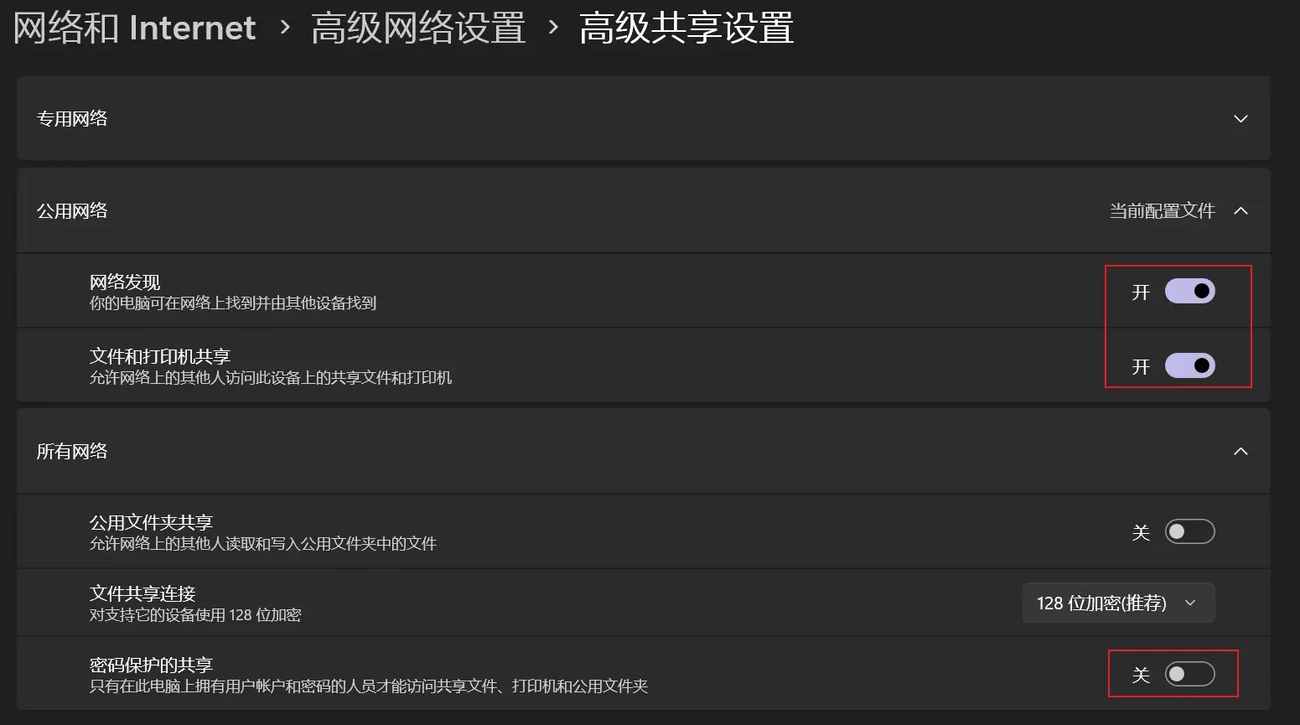
It is recommended to disable the "Password protected sharing" setting. If this setting is enabled, the account and password for this shared account need to be saved on the child nodes in advance. Otherwise, child nodes will need to request the account and password each time they connect to the shared directory on the main node.
Set Up Shared Disk
Right-click on the "Image Storage Disk (disk storing images)" and "Results Storage Disk (MipMap Disptok's working directory)", open the properties dialog, and open the "Sharing" tab in the properties dialog.
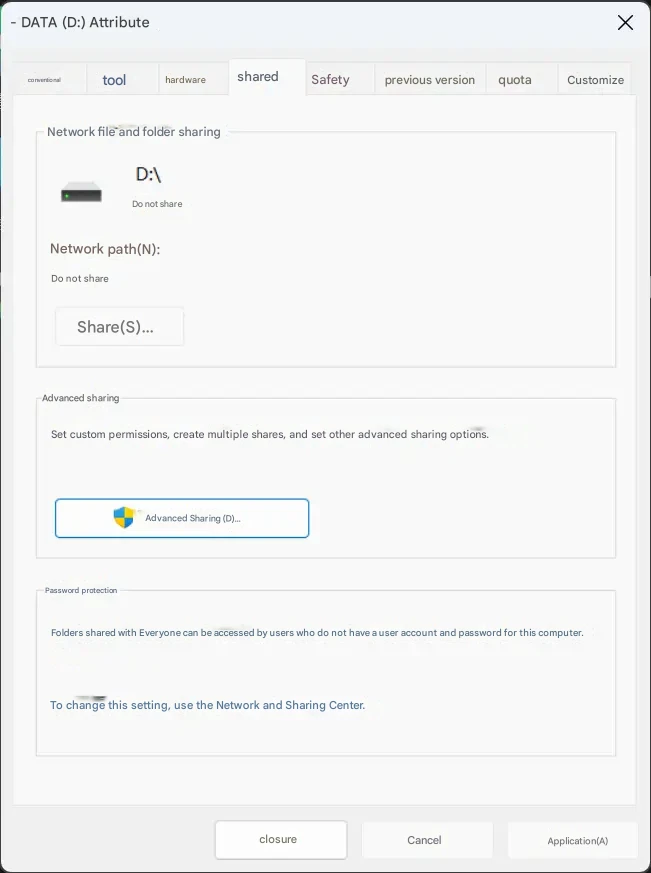
Click "Advanced Sharing" to open the sharing settings dialog. Enable sharing for this drive, set the share name, and check user permissions in the permission settings to ensure that this drive can be read and written by other computers.
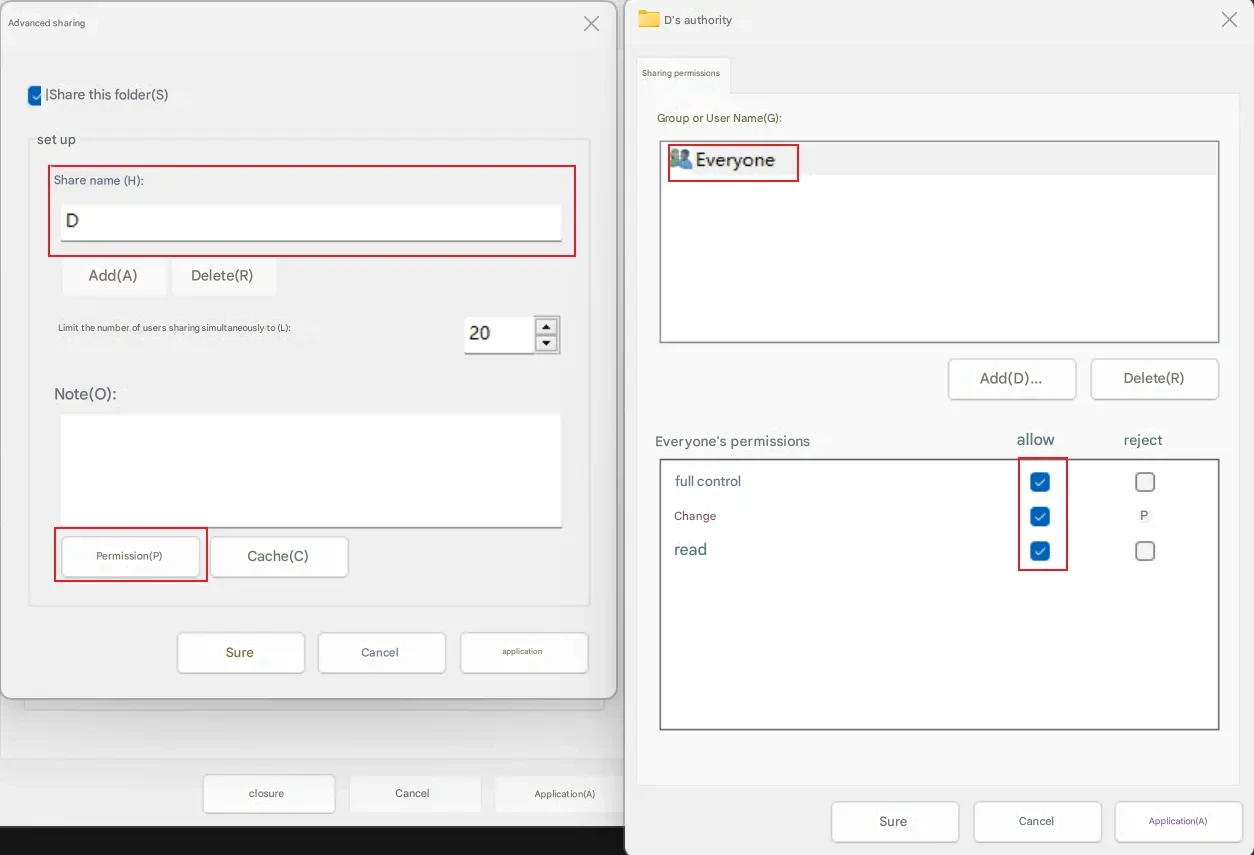
Click Apply to confirm the changes. At this point, child nodes can access this drive via IP. Check if access is normal. The access path is "\MainNodeIP\SharedDiskName".
Note: The shared disk operation needs to be set for the "Image Storage Disk", "Results Storage Disk", and other disks that will be accessed.
Cluster Configuration Method 1: Map Network Drive
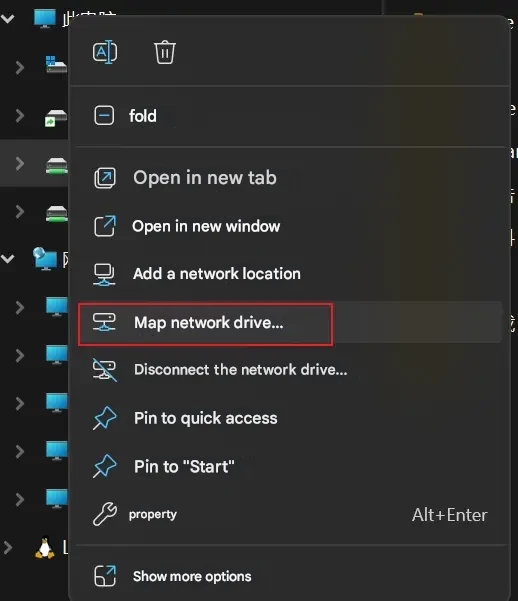
Note: When configuring the cluster by mapping a network drive, the "Image Storage Disk" and "Results Storage Disk" should be planned in advance before "Set Up Shared Disk". Ensure that the drive letter of each disk (disk drive letter can be modified in Windows "Disk Management") is consistent across all nodes and does not conflict with other disk drive letters on each node. For example: If the "Image Storage Disk" is disk "Z" on child node 1, then other nodes should not have a disk "Z", and this "Image Storage Disk" should be mapped as network disk "Z" on all other child nodes. Similarly, the configuration of the "Results Storage Disk" and other accessed disks must also follow this rule. After the above steps, child nodes can already read and write the shared disk normally. If using a network path, this step can be skipped. Right-click on "This PC" and select "Map network drive".
In the pop-up dialog box, set the drive letter and network path for the drive, and click Confirm to add it to File Explorer.
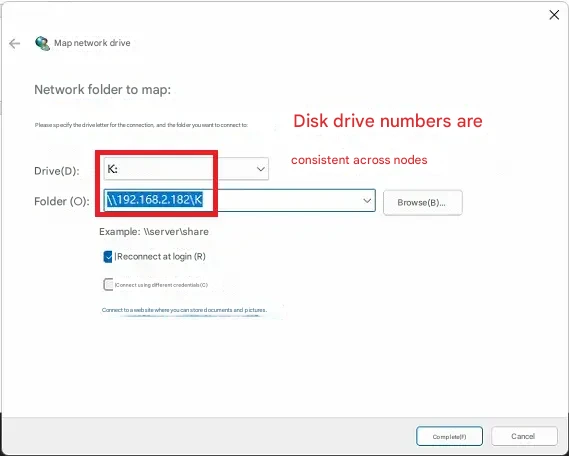
Map all disks that will be accessed by other nodes, including the "Image Storage Disk", "Results Storage Disk", and "Results Storage Disk", in the same way, and ensure that the same drive letter and path are used. After configuration, image loading and other reconstruction operations can be performed using normal disk access methods.
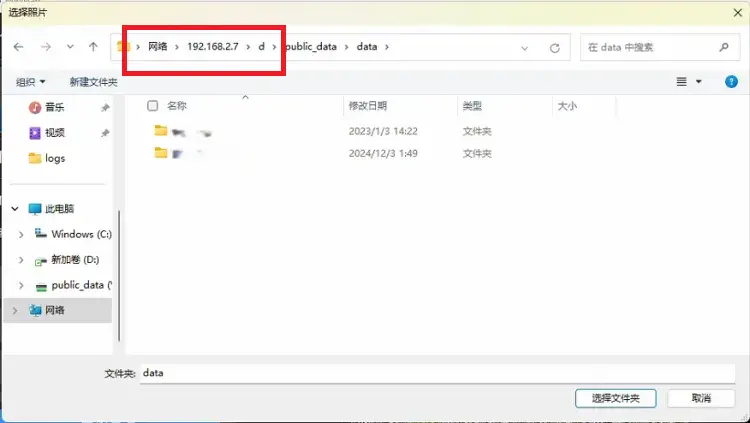
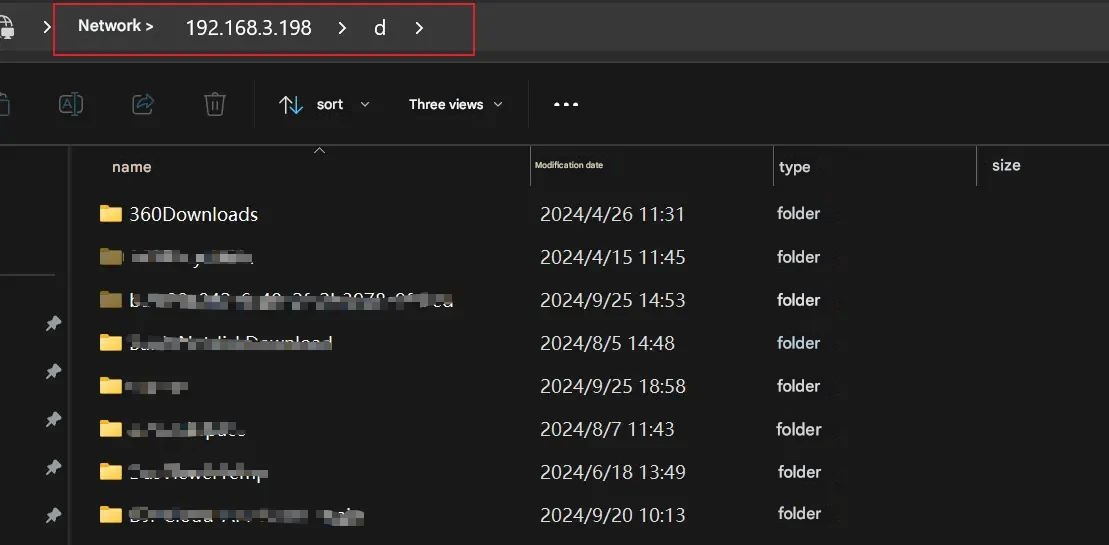
Cluster Configuration Method 2: Network Path Access
When choosing to configure using network path access, after going through "Check Node Cache Directory Space", "Set Up System Sharing", and "Set Up Shared Disk", you can directly access the results working directory and image directory via network path. First, in the MipMap Disptok working directory ("Results Storage Disk") settings, change the working directory to the network path added above or the mapped drive letter path.
Similarly, photos also need to be selected from the network path.