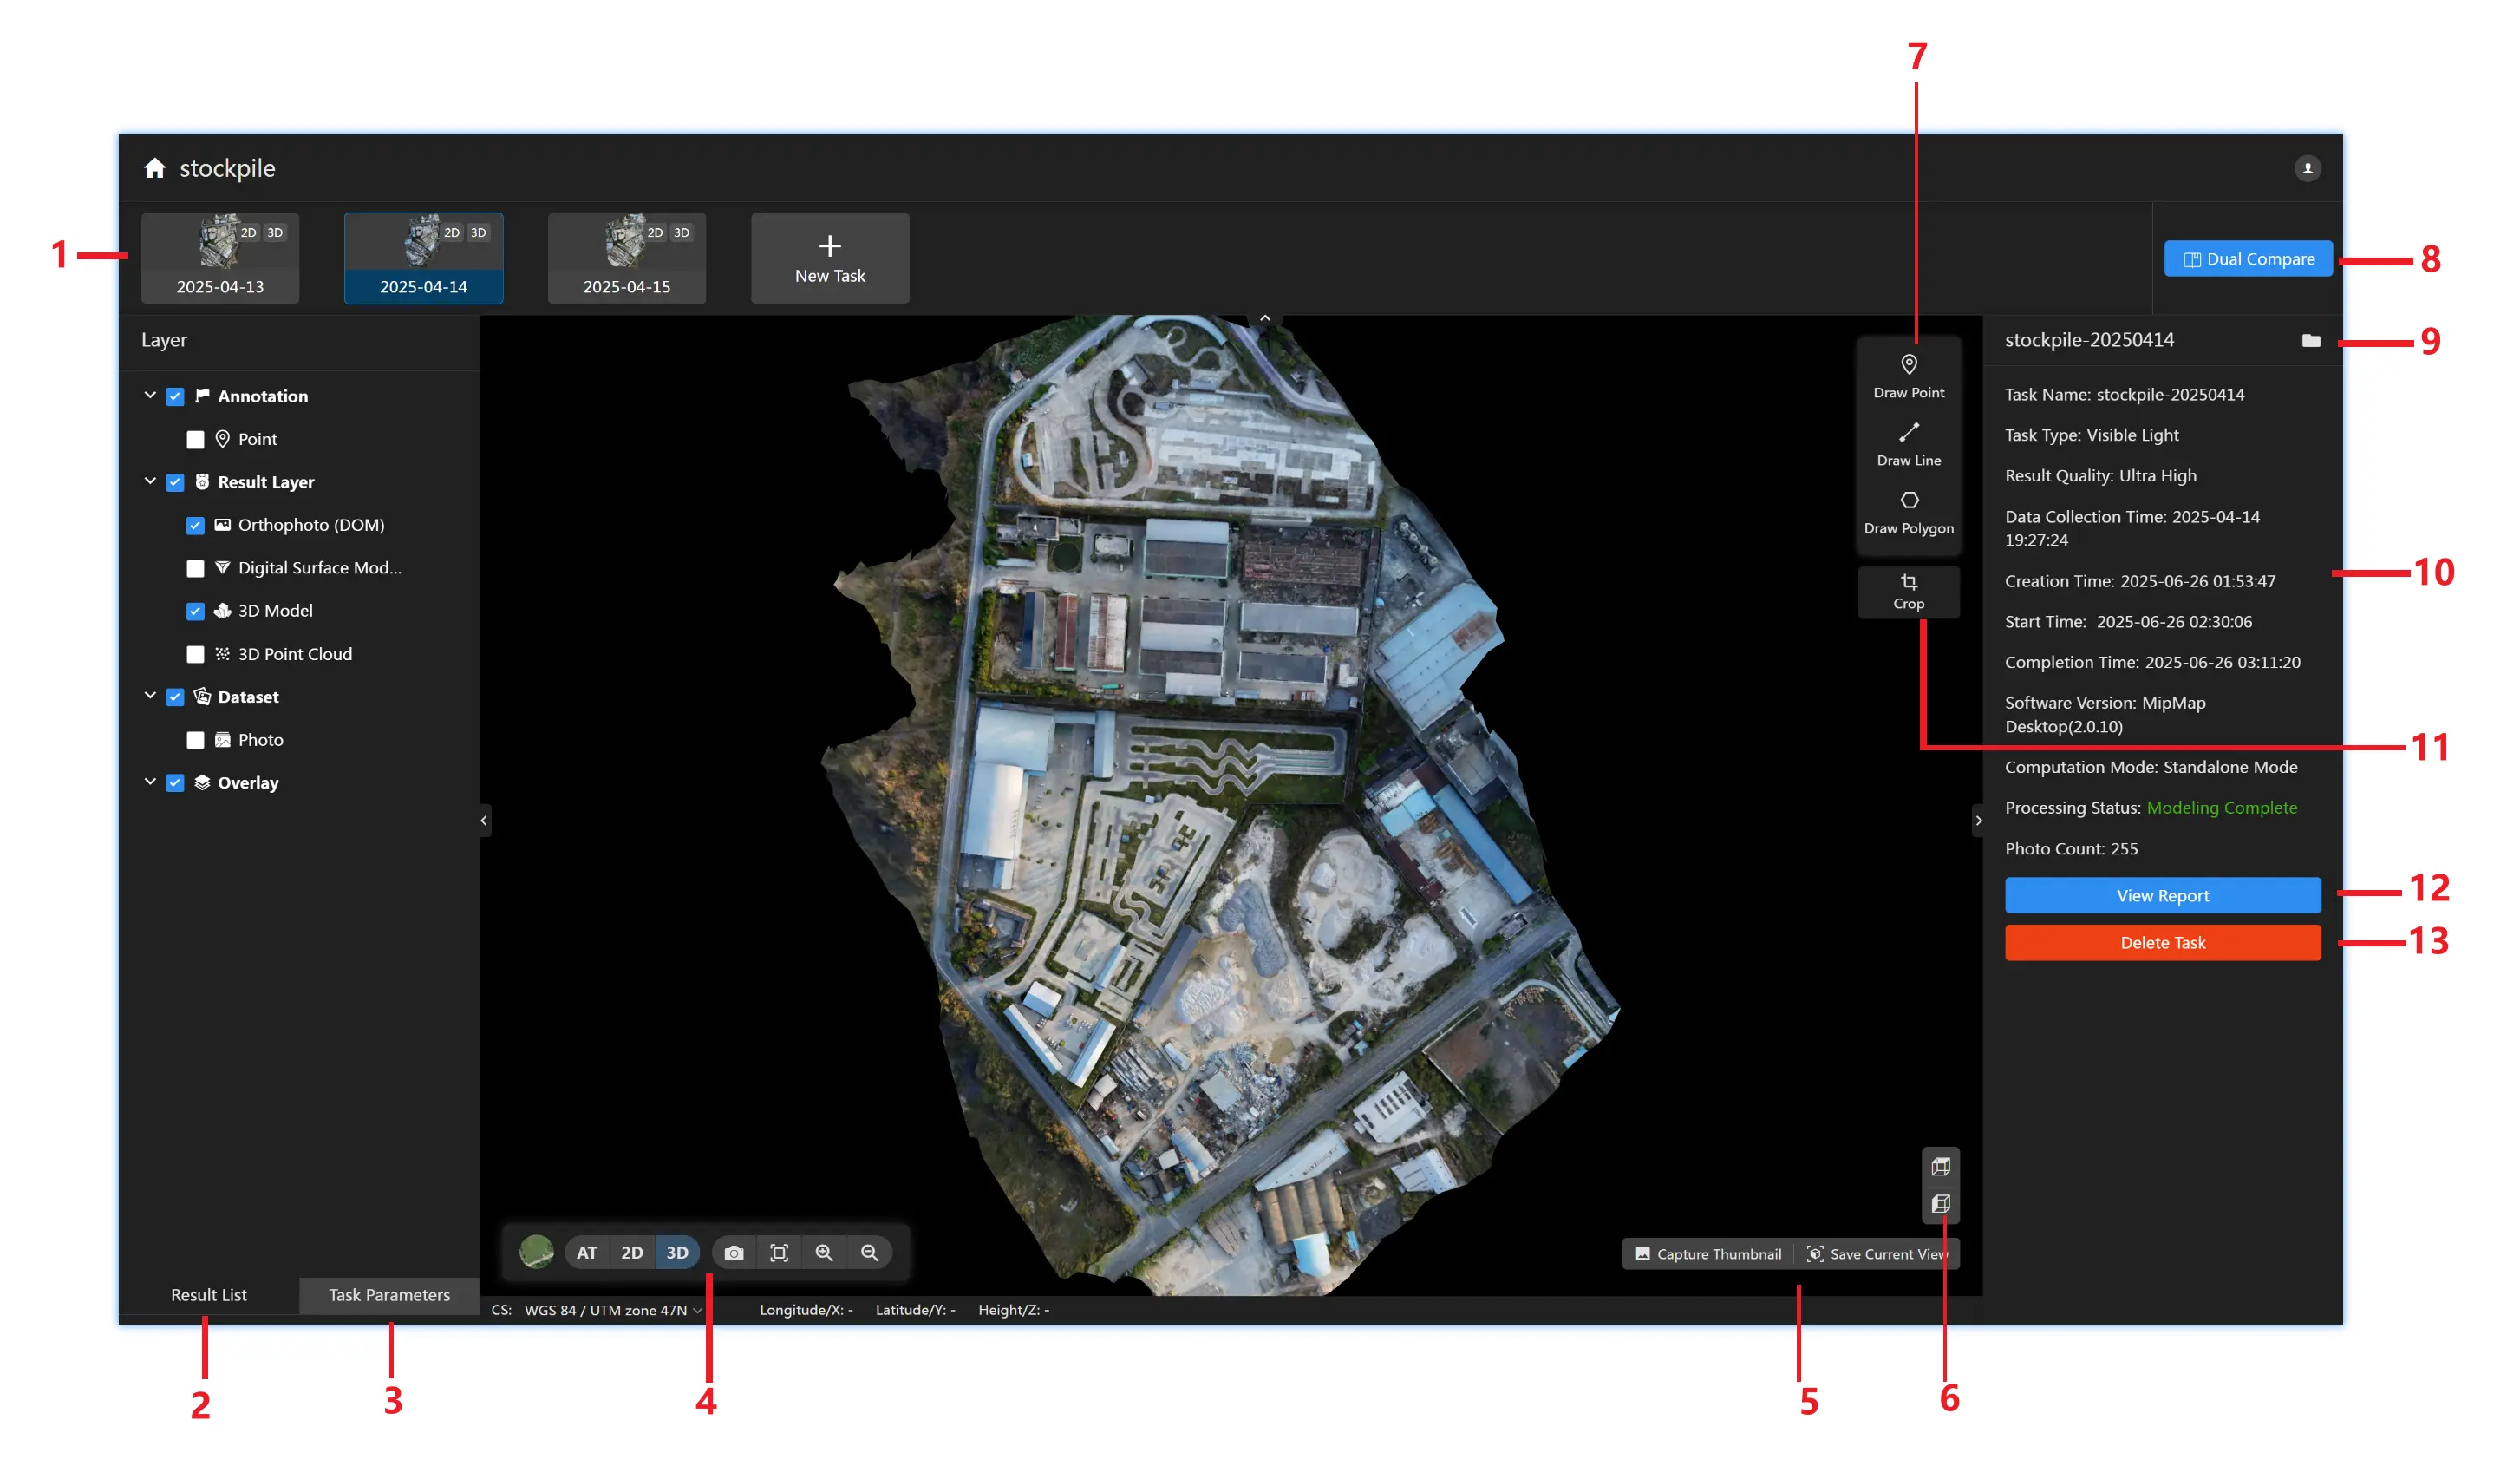
Time-Series Task Reconstruction and Result Switching Display Panel
Click the New Task button to create new time-series tasks. The creation process is the same as the previous task. Click the thumbnail button of different time-series tasks to display the results of that time-series task.
Result List Panel
Multiple selections are allowed to control the display of 2D, 3D, and annotation results.
Task Parameters Panel
: Click to display the reconstruction parameters set when creating the task, including input data, reconstruction accuracy, result selection, etc.
Result Display Toolset
: Switch Basemap. Click to switch the basemap to satellite map or standard map mode.
: 2D Results. Click to switch and display 2D model results.
: 3D Results. Click to switch and display 3D model results.
: Map Snapshot. Click to take a screenshot and output.
: Map Reset. Click to restore the map to the image GPS position.
: Map Zoom In. Click to smoothly zoom in on the map.
: Map Zoom Out. Click to smoothly zoom out on the map.
: Click to export annotation results.
3D Map Tools
: Capture a snapshot from the current view as a thumbnail.
: Save the current view as the initial state of the model.
Viewpoint Switching Tool
: Switch to top-down view.
: Switch to side view.
Surveying and Annotation Toolset
Click any surveying and annotation tool under the toolset to perform surveying and annotation on 2D or 3D results.
: Click to annotate point features and measure coordinates on the results.
: Click to annotate line features and measure distances on the results.
: Click to annotate area features and measure areas on the results.
Dual-Screen Comparison Tool
Click to compare 2D and 3D results of time-series tasks.
Task Result Directory
: Click to open the task result directory. Among them:
📁2D: 2D results folder
📁geotiffs: Orthoimages (DOM), Digital Surface Models (DSM), etc.
📁dom_tiles: Orthoimage tile results
📁dsm_tiles: Digital Surface Model tile results
📁split_dom: Orthoimage split results (requires enabling the split output button)
📁3D: 3D results folder
📁model-b3dm: 3dtiles model results folder
📁model-osgb: osgb model results folder
📁point-las: las point cloud results folder
📁point-pnts: pnts point cloud results folder
......
📁AT: Aerial Triangulation results folder
Reconstruction Information Panel
Displays relevant information about task reconstruction, including task name, task data type and number of photos, result quality, data acquisition time, task reconstruction start and end time, processing status, etc.
3D Model Cropping Tool
: Click, and users can draw a polygon on the 3D results to crop the model. It should be noted that this tool is only effective in the software's Viewer.
View Report
: Click to enter the result quality report interface, which provides reports related to task reconstruction (task information, aerial triangulation quality, reconstruction quality, etc.) and annotation reports, and provides users with a result quality report download tool .
Delete Task
: Click to delete the task and completely remove the task from the working directory.
 to create new time-series tasks. The creation process is the same as the previous task. Click the thumbnail button of different time-series tasks
  to display the results of that time-series task.
 : Click to display the reconstruction parameters set when creating the task, including input data, reconstruction accuracy, result selection, etc.
 : Switch Basemap. Click to switch the basemap to satellite map or standard map mode.
 : 2D Results. Click to switch and display 2D model results.
 : 3D Results. Click to switch and display 3D model results.
 : Map Snapshot. Click to take a screenshot and output.
 : Map Reset. Click to restore the map to the image GPS position.
 : Map Zoom In. Click to smoothly zoom in on the map.
 : Map Zoom Out. Click to smoothly zoom out on the map.
 : Click to export annotation results.
 : Capture a snapshot from the current view as a thumbnail.
 : Save the current view as the initial state of the model.
 : Switch to top-down view.
 : Switch to side view.
 : Click to annotate point features and measure coordinates on the results.
 : Click to annotate line features and measure distances on the results.
 : Click to annotate area features and measure areas on the results.
 : Click to open the task result directory. Among them:
 : Click, and users can draw a polygon on the 3D results to crop the model. It should be noted that this tool is only effective in the software's Viewer.
 : Click to enter the result quality report interface, which provides reports related to task reconstruction (task information, aerial triangulation quality, reconstruction quality, etc.) and annotation reports, and provides users with a result quality report download tool
  : Click to delete the task and completely remove the task from the working directory.